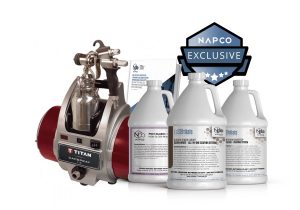
NAPCO Refinisher
How to Refinish Kitchen & Bathroom Countertops

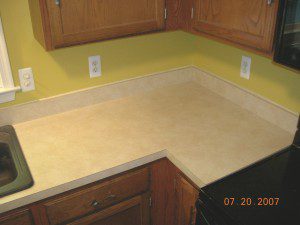
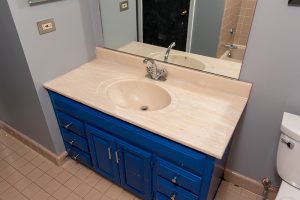
Outdated, unappealing, or damaged countertops in kitchens or bathrooms can diminish the look of an entire house. The good news is that refinishing these countertops can add value to the home, give the kitchen or bathroom a facelift, and save the homeowner both time and money.
If your clients want to upgrade their countertops, refinishing may be the best option.
How to Refinish Countertops: A Step-by-Step Guide
Countertop refinishing is the process of painting the surface of the countertop with durable coating products. These products are specially formulated to preserve the existing surface and create a like-new finish.
Follow these steps to refinish kitchen or bathroom countertops.
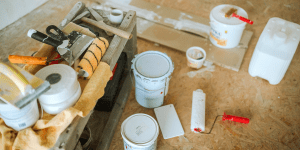
Step 1: Gather Your Supplies
There are several items you will likely use during a countertop refinishing project:
- Protective gear (goggles, face mask, etc.)
- Strong fans
- Abrasive scrubbing pad
- A strong cleaning product
- Sandpaper
- Tack cloth
- Short nap paint roller
- Angled paint brush
- Countertop coating product
You may have to gather additional supplies if the countertop surface is damaged and needs to be repaired.

Step 2: Remove the Faucet & Drain
Using a strong cleaning product and abrasive scrubbing pad, clean the surface of the countertop to remove all dirt, grease, and stains. Make sure the countertop is as clean as possible.
Rinse the counter and let it dry completely.
Step 3: Clean the Countertop
Using a strong cleaning product and abrasive scrubbing pad, clean the surface of the countertop to remove all dirt, grease, and stains. Make sure the countertop is as clean as possible.
Rinse the counter and let it dry completely.
Step 4: Repair Surface Damage
If the countertop has minor cosmetic issues like nicks, scratches, scrapes, or gouges, repair the damage. Keep in mind that kitchen or bathroom countertops with severe damage may not be a good candidate for the refinishing process.
Step 5: Sand the Countertop
With the sandpaper, scrub the countertop all over until the surface feels a little rough. This roughening process makes it easier for the coating product to stick onto the surface.
Remove all the resulting dust with a tack cloth.

Step 6: Apply the Coating Product
First, ventilate the bathroom or kitchen by setting up strong fans to suck fumes outside.
Then, apply a thin layer of the coating product. Use the short nap roller to paint most of the surface and the angled brush to paint the edges and hard-to-reach spots. Don’t forget to take your time and use a small amount of product for each layer, because layers that are too thick will bubble up.
The countertop may require a few layers of coating product. Make sure the surface dries completely before you apply the next coat. It may take about one to two hours of drying time each round.
Step 7: Wait for the Surface to Cure
After you have applied the top protective coat, let the surface dry completely. The surface must cure for at least two or three days before it can be safely used.

Step 8: Replace the Faucet & Drain
When the countertop is cured, replace the faucet and drain and give the surface one last wipe-down. Then, it’s ready for the homeowners to use and enjoy.
Learn How to Refinish Kitchen & Bathroom Countertops at NAPCO
The NAPCO training program offers sessions for both new and experienced refinishers. Our industry-leading training opportunities are led by highly experienced trainers and include extensive hands-on experience as well as technical and marketing support beyond the program. We are also proud to offer a customer loyalty program that helps refinishers stay on budget and save even more on top-tier refinishing materials.
Register for training, shop our products, or call us at 800.888.1091 for more information.